Showing posts with label The Modern Baker. Show all posts

Wednesday, February 1, 2012

Cappuccino Thumbprint Cookies: Modern Baker Challenge


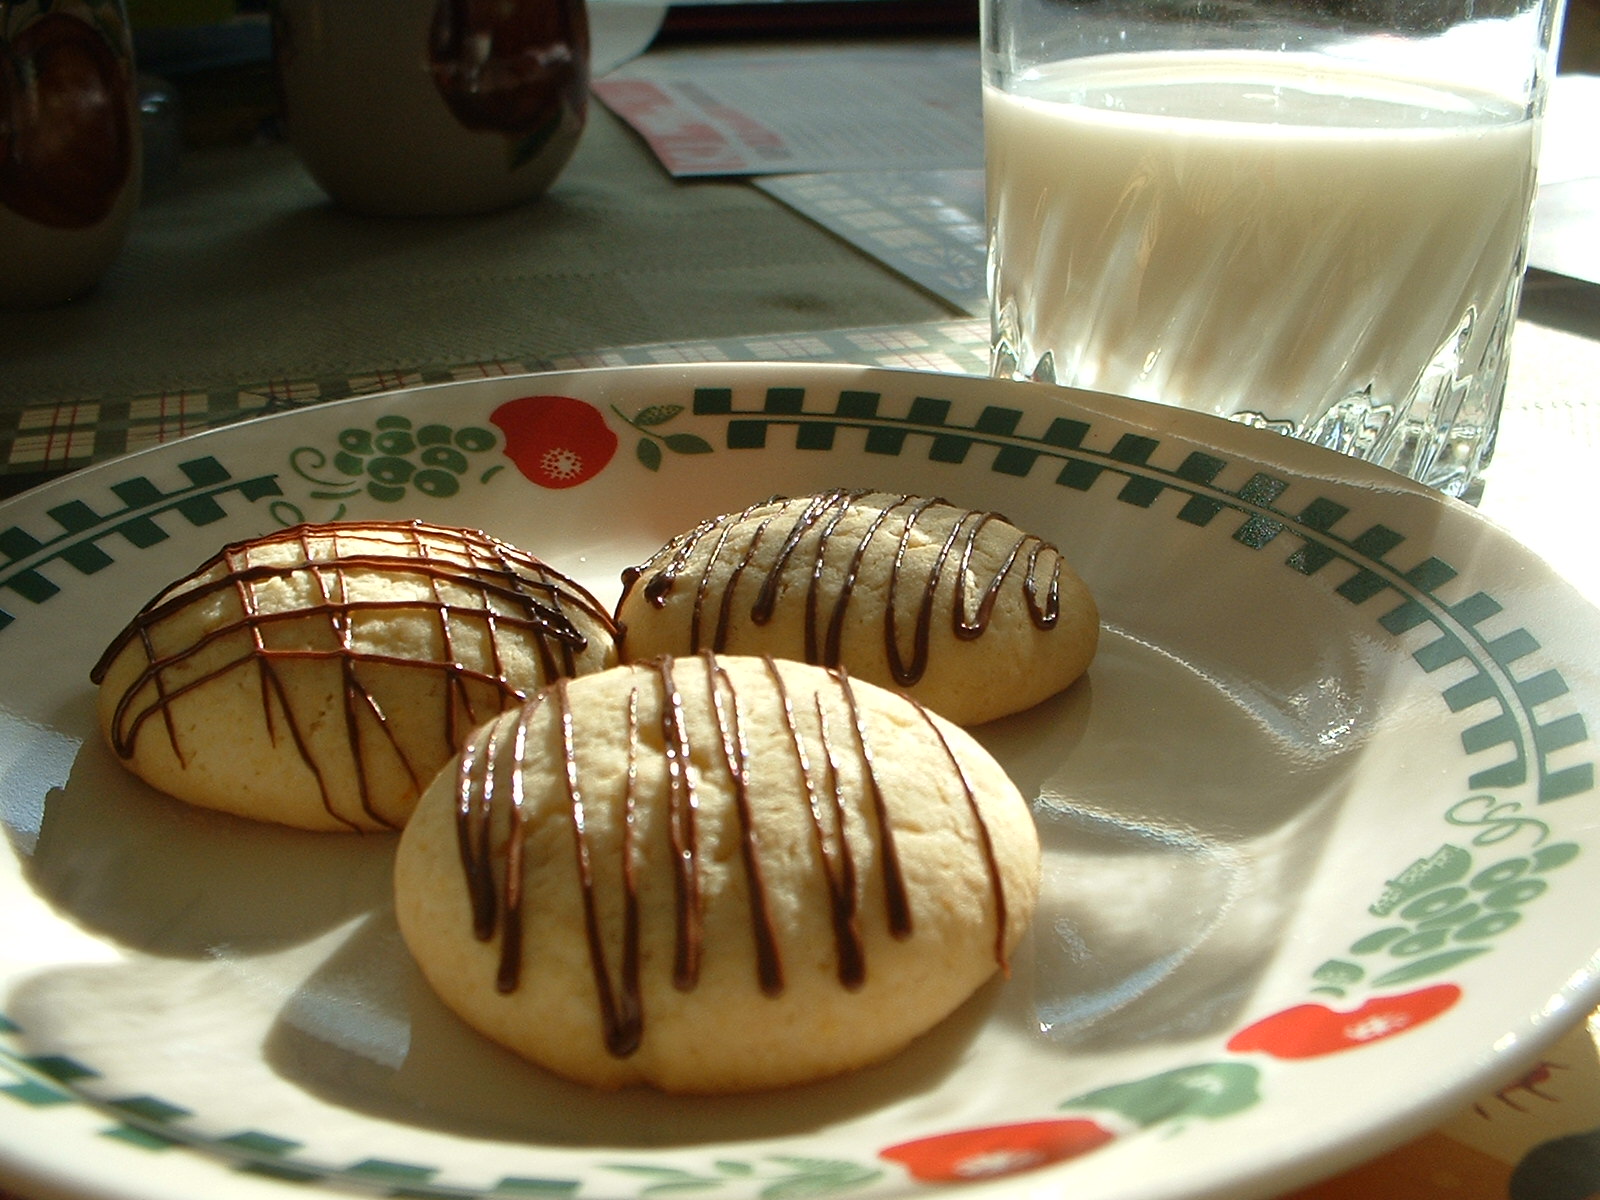
The Cappuccino Thumbprint Cookies were my first pick from the Cookies, Bars, & Biscotti section of Nick Malgieri's book The Modern Baker.  They reminded me of the peanut butter blossom cookies my mom made us when we were kids, that had the Hershey's Chocolate Kiss in the center.  As as adult I've also grown to love thumbprint cookies with jam in the center, so I couldn't wait to try these.

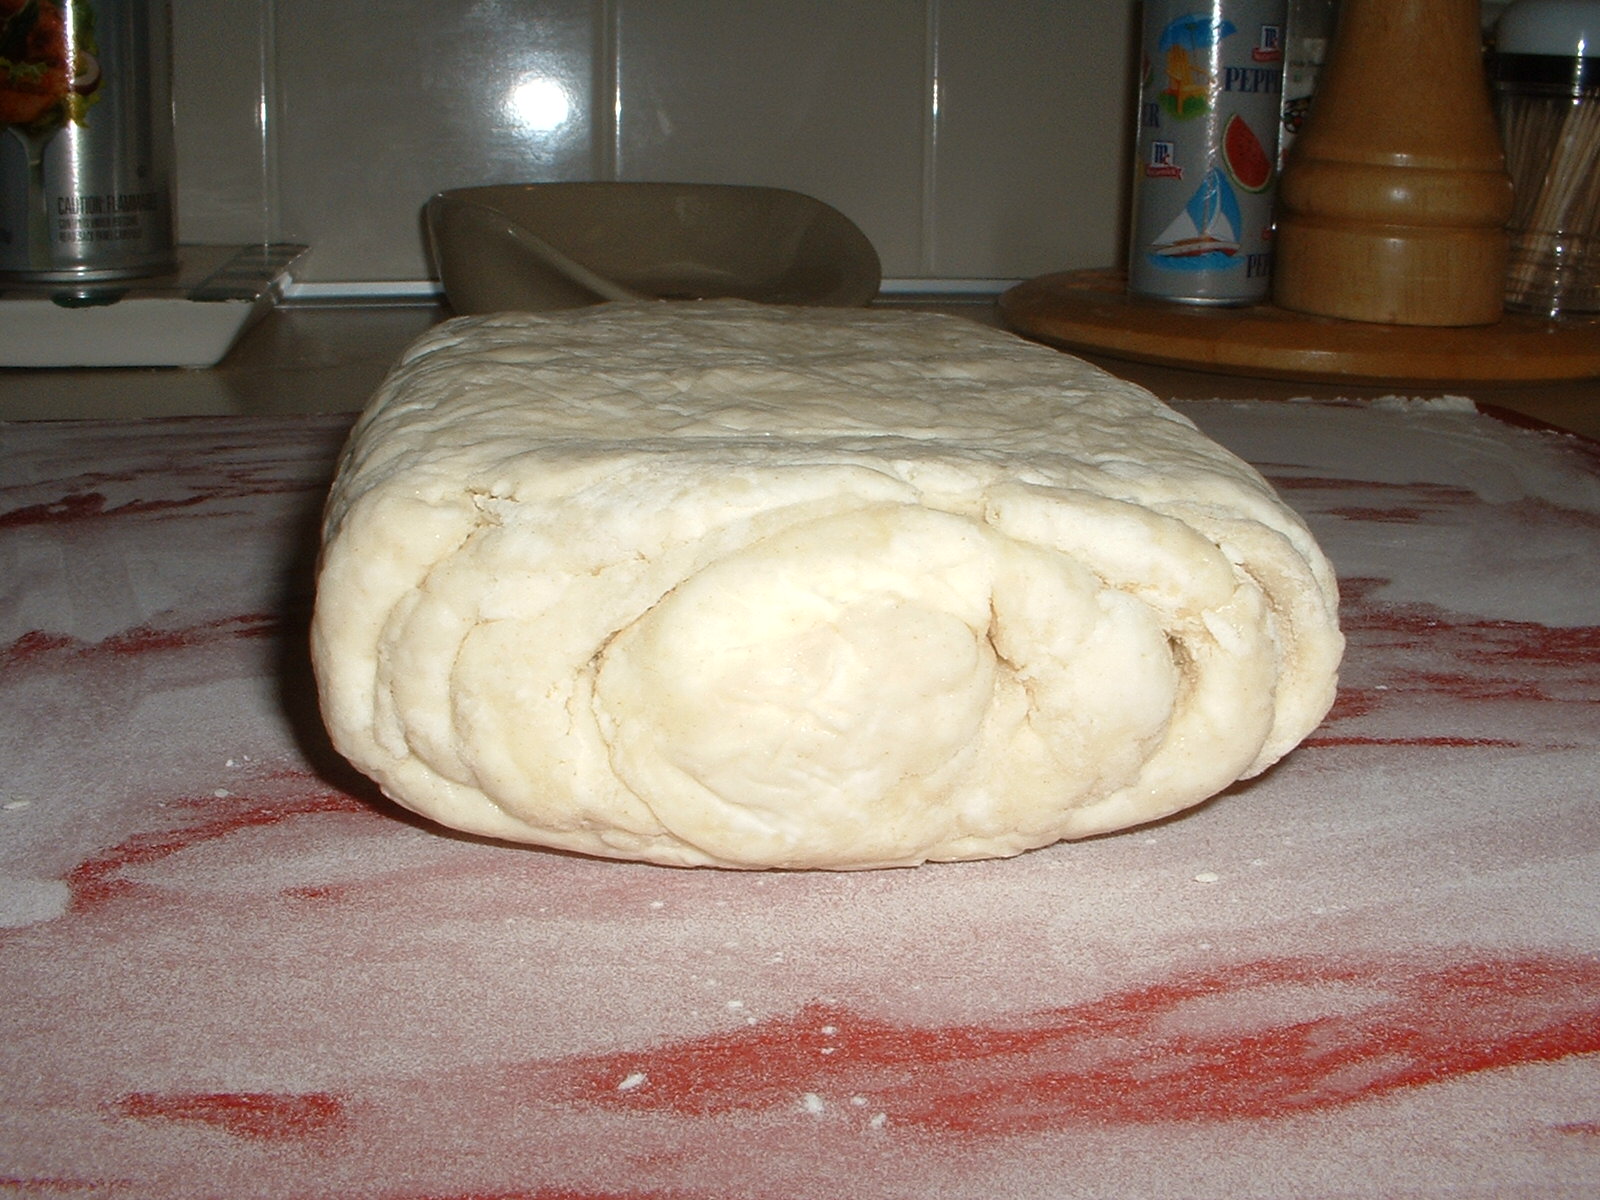
The dough was easy to mix together and to get it into the 8-inch square shape before chilling, I opted to just dump the dough into my 8X8 pan.  It seemed to make the most sense to try it that way.  I smoothed out the dough, wrapped it good in seran wrap and dashed off to the grocery store, while the dough chilled for a an hour or so in the fridge.  Since the pan that I shaped my dough in didn't have perfectly round corners, and because my measuring wasn't exact, I had some pieces of dough that were definitely smaller than others.  So I stole bits and pieces of dough from larger squares as I was forming my little spheres.  

The dough got soft rather quickly, since it takes awhile to shape 20 little spheres of dough, so while I was working on the first sheet pan of cookies, I put the remaining dough back in the fridge until I was ready for it.

Coating the spheres in the egg white, before covering in the finely ground almonds, gave me some trouble.  I assumed you were to coat the whole sphere in egg white, so I lowered each sphere into the egg white and then carefully flipped it to cover both sides.  Some of the spheres did not want to come out of their egg white bath.  They'd jump off the fork and flop back in.  Urrghh!  Maybe it would've been easier to just use a pastry brush to apply the egg whites to the spheres?  

I debated about what to use to make the cavity in the tops of the cookies.  In the end, I used my pinky for the first sheet pan, and for the second sheet pan, I used my old plastic 1/4 tsp measuring spoon.  It seemed though, like the cavities in the picture in the book are bigger than mine. 
Cookies in the oven, it was time for a coffee break :)  

Whenever a recipe calls for strong brewed coffee or espresso now, I whip out a packet of my Starbucks Italian Roast Via coffee.  Instead of adding 8 oz of water to the packet contents, I add 6 oz to ensure it's nice and strong.
The cookies baked up fine and the browning almonds smelled quite nice, but my little cavities started disappearing as they got near being done :(   

I grabbed my little 1/4 tsp measuring spoon and as soon as they came out of the oven, while still soft, I gently used the spoon to press out the little cavities.  Don't push too hard though, as the cookies will crack.

The #1 mistake I made was to add cool vanilla to my melted white chocolate.  My melted chocolate seized up and no matter how much I stirred, even after adding my hot espresso, I couldn't do anything with the chocolate filling.  It was a grainy, lumpy mess.  I had to throw it out and try again.

For my second attempt, I only used 4 oz of white chocolate and some semi-sweet regular chocolate (to give the filling a darker color).  I added my vanilla to my espresso, then poured the espresso over the chocolate.  I then placed the bowl over my barely simmering water and melted the chocolate.    

I let the filling cool a bit, then poured it into a disposable decorating bag and filled all my cookies.  I'm not sure how Nick got such glossy smooth tops on his cookies.  My filling wasn't thin enough to ooze down into each cavity and smooth itself out.  I tried smoothing the tops with an offset spatula, but that didn't work.

The finished cookies were still very attractive.  We thought the flavor of these cookies was just OK, though. We like the toasted ground almonds on the outside of the cookie, but the flavor of the cookie is kind of plain, and they are a little dry.  Hubby says they taste 'floury'.  The flavor of the filling is good, but there is just not enough of it to make up for the flavor/texture lacking in the cookie itself.  Maybe this cookie is just not right for us, since we tend to like moist, chewy cookies.  Anyway, I'm glad I tried this recipe and I'm off to try another.   So far the Cocoa Nib Brownies are still my favorite!


Monday, January 2, 2012

Melting Moments:Modern Baker Challenge

Yesterday seemed like the perfect day to bake cookies.  It was sunny with a few big puffy clouds outside and not too cold.  All the gingerbread men were gone, and since I missed out on most of my holiday cookie baking due to our move, I was not all baked out.

When I was at Whole Foods this week I picked up a plump, organic navel orange.  I love this time of year when the citrus fruit from Florida begins filling the supermarket bins.  I was searching for a cookie recipe to try & noticed that the recipe for Melting Moments from Nick Malgieri's book The Modern Baker, called for lots of orange zest.  This was one of my picks for The Modern Baker Challenge,  so I zipped back over to Whole Foods yesterday and got me another orange so I could try out this recipe.

The first step in the recipe calls to beat together 1 cup confectioners' sugar and one stick of unsalted butter.  I was already a bit hungry and craving something sweet, so when I saw the sugar and butter coming together in the mixer bowl, all I could think of was buttercream frosting, and had a strong urge to stick my finger down in the bowl to sample some of it.   I was good though, and resisted.
This recipe is kind of unusual in that it calls for lots of cornstarch, 3/4 cup worth.  I have made another cookie recipe before and it calls for a lot of cornstarch too, and sometimes it seems like I can taste the cornstarch and I don't like that, so I wondered if these cookies would be the same.

For the first sheet of cookies, I slid a small amount of dough off of a spoon with my finger onto the parchment sheet (since I don't have a tiny cookies scoop).  The first finished batch of cookies came out sort of irregular in shape, though, so on the remaining sheets of cookies,  I rolled balls of dough between my hands to make my rounded teaspoons.  The finished cookies came out much rounder that way.  I baked my cookies for 19 minutes and only one sheet at a time and I got exactly 48 cookies.
These cookies baked up firm with a very assertive orange flavor from the orange zest and orange extract.  I don't know that they melt in your mouth, like I thought the name implied, but they are very good.  I think these would be a good cookie to make at Christmas time to complement all the other goodies.

Before you bake the cookies you're supposed to make a crisscross design on top with a fork, but the pattern didn't show up very well on my finished cookies.  I tried flattening the cookies more, but the pattern still wasn't very visible.  I wanted to add a bit of pizzazz to the cookies, so since chocolate goes well with orange, I decided to melt some semi-sweet chocolate chips and drizzle the melted chocolate over the cookies.
There, that's much better!  You couldn't taste the chocolate much since the drizzle is so thin, but they sure looked prettier.  I think I'll have to drizzle more chocolate on next time.  Hubby and I are really enjoying these cookies.  Since they're small, its kind of hard to eat just one, and they are wonderful with milk or hot tea.

We are enjoying the cookies, bars and biscotti section of NM's book, so I'll definitely be on to the next recipe as soon as we're finished with our Melting Moments:)


Posted by Picasa

Monday, September 19, 2011

Apple Strudel using NM's Instant Puff Pastry

This time around for the Modern Baker Challenge, I chose the Apricot & Almond Strudel recipe from the puff pastries section of Nick Malgieri's book, The Modern Baker.  I was a little nervous about this recipe as the instructions for making his instant puff pastry seemed too easy and I knew it couldn't be that simple.  The pictures all showed a clean work area and perfect looking dough.

Before I started making the instant puff pasty, I had decided I would take pictures at different stages, but as I started into it, I ran into problems from the beginning, so I felt lucky that I even got the puff pastry dough made at all.  My poor old Hamilton Beach food processor bowl only has a 3 cup capacity, so I knew I could only make at most a half batch of Malgieri's instant puff pastry, which was fine since this recipe only required a 1/2 batch.  The amount of butter and flour, though, for a half batch of puff pastry, was still a little much for my food processor bowl.  I had a lot of flour going everywhere and when I went to dump everything out onto my floured mat, I had quite a bit of loose stuff. 

I managed to get the puff pastry made, with a minimal amount of grumbling, wrapped it tightly in plastic wrap and tucked it into the back of the fridge on the bottom shelf.  I was really worried if the stuff was going to roll out OK for the strudel, because it was very crumbly and I had a tough time rolling it up in the last step of making the puff pastry.  I was rolling with one hand and using my large off set spatula with the other, to get under the dough that was sticking to the mat.  It was definitely not a tight log.

Here's my puff pastry log before I started rolling out dough for the strudel,
I wish I could've rolled it tighter to get more layers into my puff pastry, but better luck next time I guess.

I asked hubby, apricots or apples for the filling, and I knew he would pick apples.  He's not a real big fan of apricots, and since fall is quickly approaching, it seemed more appropriate anyway to use an apple filling for the strudel.  Then as I kept looking at the recipe, I just couldn't see apples paring well with the almond part of the filling, which is made w/ almond paste.  I thought the almond paste mixture would overpower the apples and that the apple flavor wouldn't shine through. 

I'd just recently purchased a copy of America's Test Kitchen's third installment of Cooking for Two 2011, and what da ya know, there was a recipe for Quick Apple Strudel near the back.  They used phyllo dough for their strudel, but the filling sounded really good so I decided to double it for my strudel and away I went.

The ATK apple strudel filling consisted of:

1/4 cup golden raisins
1 tablespoon Calvados, applejack, or apple cider (I used cider)
2 tablespoons dried bread crumbs or panko (I used the latter)
1 tablespoon melted butter (for toasting the bread crumbs in a small skillet)
1 medium McIntosh apple, peeled, cored, sliced and diced into 1/4 inch pieces
2 tablespoons sugar
1/2 teaspoon fresh lemon juice
1/8 teaspoon ground cinnamon
Pinch of salt

I doubled this filling recipe and for the apple I used roughly two apples, which consisted of Golden Delicious, Cortland, and a McIntosh.  Whenever I make apple anything I use several different kinds of apples to get varying flavors and textures in the finished dish.

Here's the bottom layer of my strudel before and after laying on the filling,

The top layer of the strudel remained in the fridge while I docked the bottom layer and spread my filling out onto the dough leaving a 1/2 inch margin all around.  Then the top layer came out of the fridge and after cutting the slits in it and brushing egg wash on the edges of the bottom layer, the top was placed on, sealed, crimped, poked, prodded and everything else.  Here she is ready for the oven,
and at this point is where my tummy usually starts growling a little prematurely, since I know it'll still be a while before we can dig in!

Unfortunately, the strudel wouldn't fit on my rimmed half sheet pan, so I then had to bake it on my rimless air bake cookie sheet and butter went everywhere in the baking process.  Oh well, I rarely make oven messes so this little one shouldn't be too hard to clean up.

It was worth it and hubby declared that it was delicious.  I thought it was good, and very flaky tender, but it was just a tad bit greasy tasting to me, because of all the butter.  I know one thing, I probably won't be trying to make my own puff pastry again until I get a knew 12-cup food processor!

Yum!!!!!!!!

Wednesday, July 13, 2011

Raspberry Almond Tartlets: Modern Baker Challenge


I was snooping around on the Modern Baker Challenge site a couple weeks ago, and I noticed that it looked like one of the tartlets from the Sweet Tarts and Pies section didn't get taken by anybody to make.  I thought it would be a shame if nobody made those wonderful sounding tartlets.  Actually I didn't have the book at the time (I later got it from the library), so I couldn't even look at the recipe, but how could something called raspberry almond tartlets not be scrumptious.  I timidly typed a message saying I would bake them if no one else had claimed them.  Yea!, Phyl responded and said he had assigned them to me.  I was so excited to be baking & posting about something other than bread.

It was the perfect tartlet recipe, as it called for almond paste, raspberries and sugar, several of my favorite ingredients.  As luck would have it, I had exactly 4 ounces of almond paste in the freezer in a glass jar that was left over from a previous baking project.  I used Smucker's Simply Fruit (Raspberry) for the seedless raspberry preserves called for in the recipe.

The crust for these tartlets was made from the Sweet Tart Dough recipe found on page 160 of Malgieri's book The Modern Baker.   I made the dough the day before the tarts, although I wondered how long the dough was required to be refrigerated before you could use it.  This was only the second time I had used my old Hamilton Beach food processor to make a dough.  I'm amazed at how easy it is to put dough together with a food processor.  It's not so fun to wash all the nooks and crannies of the processor bowl later, but I think it's worth it to save the time.  It only took maybe 10 mintues to put the dough together using the food processor. 


Into the fridge the disk of dough went until the next day....

Before working with the dough, I read very carefully page 162 in his book re: rolling tartlet crusts, because I knew this dough could be hard to work with if I didn't do it correctly.

They should mention in this section, I think, that when you go to knead the cold dough that it will break and crumble a bit at first, before you're actually able to knead it.  But it did soften in my warmish hands, and after it did, I flattened it and used my pastry scraper to divide it into 3 pieces. 

Rolling out the dough and cutting the 24 circles was the most time-consuming part of the whole recipe, taking me maybe 45 minutes to do.  I put the tartlet pan full of dough circles back into the fridge for 45 minutes to chill before finishing.
The almond filling for the tartlets was very simple to mix up, using the food processor again.  I bought a package of Driscoll organic raspberries that contained HUGE berries.  The berries were so large that I laid them on their sides inside the little crustlets and squished them down slightly.  Just for fun, to see if they would be any different, I put a frozen raspberry into four of the tartlet crusts.  However, when I took all of the tartlets out of the pan to arrange on a rack to cool, I forgot which ones had the frozen berries.  Ooops, oh well, they've all tasted wonderful so far so I don't see why you couldn't use frozen berries in the winter.

There was plenty of the almond filling so I put more than 1 scant teaspoon into each crust.  It was probably closer to 2 teaspoons into each tartlet.  I was running low on sliced almonds, and that's why each tartlet isn't completely covered in almond slices, but I think they were just so delicious it didn't matter.

I'm glad it was nearing the end of the day, because I could have kept eating and eating these little things.  So very good with tea or coffee!  I think these would be a great hit at any family gathering, or baby shower or bridal shower.  They do take a bit of time, but are worth it for the raspberry & almond lovers out there.

Monday, April 4, 2011

Gingersnaps (AB version)

This Saturday was a productive day, with over 4 dozen gingersnaps coming out of my kitchen.  I've had Alton Brown's gingersnap recipe sitting on the landing above the living room for ages.  I'm not a gingersnap fanatic or anything, in fact I can't even remember having one before, due to the fact that if I don't make it, I don't eat it, if it's a cookie.  I cannot bring myself to buy store boxed cookies.  I have seen gingersnaps called for in numerous recipes before and I've heard many people exclaim that gingersnaps are one of their favorite cookie, although they've only had store-bought gingersnaps.

I've always had success with Alton Brown recipes and when I saw his recipe for gingersnaps, I was intrigued.  His recipe calls for three forms of ginger: ground, candied and fresh grated.  I knew these cookies would have flavor, but would I like them?  Another reason I was hesitant to make these at first was because they call for molasses and hubby does not like molasses.  On Saturday though, I asked him if he would like me to substitute honey for the molasses, but he said 'no, its ok, go ahead and make them with molasses'.  (He likes the gingerbread men I make at Christmas and they do have molasses in them)

I had also considered making Nick Malgieri's Three-Way Gingersnaps from The Modern Baker, but Alton's recipe was way more interesting spice wise.  AB's recipe calls for ground cardamom and ground cloves as well as the ground ginger.  For the ground cardamom I used:

This past year I had skipped making several recipes because they called for ground cardamom and I didn't have any.  When I checked the price at the grocery stores, I thought no way am I spending that for a spice I will use only occasionally.  Well, it just so happens that Penzeys carries cardamom, the white kind, in the whole pods.  They also carry green cardamom, which I believe is usually used in savory dishes, whereas white cardamom is usually used in desserts & breads.  I've been told that the cardamom will last quite some time in the pods, without being ground yet.  This is one pungent spice!!  I snip off the tip of a pod and dump the teeny black seeds into my coffee grinder (used only for spices).  I'm sure the fact that I ground my own cardamom gave these cookies even better flavor.

The verdict, after Saturday's baking, was that these little gems are exceptionally good.  I don't know this for certain, but I would bet that the cookies I made do not even compare with ones you buy in a box, not even the ones I've heard they sell at Trader Joe's.  However, I will be trying Nick Malgieri's recipe in the near future just to see how they compare.  If you would like to give AB's recipe a try it can be found here.

 Thank you for visiting my blog and feel free to leave a comment and/or let me know if you have a favorite gingersnap recipe!