Tuesday, May 31, 2011

My First Stromboli

While everyone else was out grilling, well not everyone since it was 90° outside, I was inside working on my first stromboli.  When Lien announced that the Bread Baking Babes would be making Stromboli for May, I knew I had to bake along with them for the first time.  I think my favorite cuisine, besides Mexican, is Italian and I had not yet tackled a stromboli.

The dough was very easy to work with, and after chafing for 5 minutes, the dough ball was so smooth, shiny, and satiny, that I had to stop a moment and admire it before I had to flatten it.  (After going to Heather's blog "girlichef", I was introduced to what it means to chafe the dough.)
For the filling of my first stromboli, I used large, sandwhich pepperoni that I had cut at the deli, very thinly sliced country ham also cut at the deli, a handful of basil leaves from my herb pots, three cloves of minced garlic and smoked mozzarella.  I wasn't able to find smoked swiss, so I thought I'd give this a try.
The smoked mozzarella was very good, but it didn't get all oozey and gooey like other cheeses when they're baked.  My husband said this was a good thing, but the cheese did not come out of the holes that I had poked through the rolled stromboli with skewers.  However, maybe I should have put the cheese slices on the dough first, so that they would be right against the holes I would be poking through the rolled log and maybe it would have oozed out a bit. 

The dough rolled up quite nicely and I only had a little bit of sticking to the mat.  I tried to roll it as loosely as I could, like a swiss roll, and here it is all ready for the oven.  I baked mine on a sheet of parchment rather than directly on an oiled baking sheet.  Also, mine didn't bake for quite the full hour, as it seemed done and was quite browned on the outside.

My finished stromboli was a little tricky to cut, but we managed to make a couple nice slices for each of us and we dug in.  This is a very filling dish and it was tasty, but a little too salty for me.  My husband said he thought this was better than the calzones I've made, but myself, I happen to like the calzones better.  This was a nice little challenge and now I can check another item off my mental list of things I want to try.  I will need to think how I can vary the filling ingredients, so that it's not quite so salty next time.

Oops,  I didn't get my post submitted in time for the roundup of stromboli creations, but you can go here to Elle's blog, "Feeding My Enthusiasm"" to view all the wonderful stromboli.

Thank you for visiting my blog!

Thursday, May 26, 2011

Five-Grain Bread with Pate Fermentee (Mellow Bakers: May)

At the beginning of the month I think I have all the time in the world to make the breads I want to do that month, and then before I know it, the 31st is upon me!  This is always a busy month for me as I'm sure it is for alot of others.  I plant my flowers and herbs and the end of May is always strawberry picking time, at least here in Central Kentucky. 

During the beginning of the month I was enjoying my new copy of PR's Artisan Breads Every Day, making one recipe after another.  It was interesting that the last bread I made before attempting Hamelman's Five Grain Bread on page 129, was Reinhart's Many Seed Bread from ABED.  Both breads were very good, but I think I'm kind of leaning towards enjoying Hamelman's Five Grain bread the best.

I made my pate fermentee and soaker the night before I planned to bake the Five-Grain bread.  I could not find any rye chops for the soaker, which was no surprise to me, since so many other people cannot find them.  I did buy some whole rye berries from Whole Foods though, and attempted to chop them in my coffee grinder.  It didn't really work too well.  I pulsed a couple times, sifted, pulsed a couple times, sifted (to get out the powdery stuff).  Each time I opened the coffee grinder a 'cloud' of rye dust billowed out and it was kind of messy.  Even after numerous pulses there were still quite a few whole rye berries, but I knew I couldn't keep grinding or I'd have mostly rye dust, so I just dumped the sifted 'chops' along with some whole berries into my soaker bowl.  Since there were some whole berries, I decided to use boiling water in my soaker just to make sure they were softened enough.  I left the sunflower seeds out of the soaker and toasted them in the oven.  (For PR's Many Seed bread the sunflower and pumpkin seeds are lightly toasted and it tasted really good that way.)

The next day before I started mixing, I picked a rye berry out of the soaker to put in my mouth to see if it was soft enough and it was, so I was pleased with that.  My pate fermentee was huge and had bubbles formed on the surface of it, which was quite cool.  No problems mixing, folding, or shaping.  I made four rolls for dinner and one loaf that was a little over 1.5 pounds.  I did have some problems scoring the large loaf and it showed in the end that my scoring was not very good this time, but that didn't matter, because the flavor of this bread made up for any other deficiencies.  I took this picture the next day after baking, in the morning sunlight so you could see the inside:
My husband just loves this bread and so do I.  I haven't made any PB&J's with it because it just doesn't seem like they go together, but we've been making turkey/provolone sandwiches with it all week.  The crust and interior of the loaf is soft, which is kind of nice that I don't have to fight with the bread to rip off a piece to eat.  It makes great toast too!  We'll definitely be making this one again.

Of course the camera said my hand was shaking, but here's another shot of just one slice with the morning sun behind it,
 Thank you for visiting my blog and I hope you'll give this bread a try!

Monday, May 23, 2011

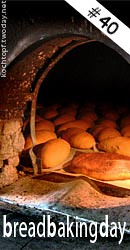
Dilly Bread (BBD #40)

The theme for this month's Bread Baking Day was announced as Bread with Curds.  Not being familiar with curds at all, I was a little worried at first, until I went back to zorra's announcement of this BBD, and read that we could use curds, cottage cheese, quark or paneer.  Whew!  I was relieved .  I love cottage cheese and have used it in bread in the past, just not very much.  My favorite way to eat cottage cheese is a small bowlful, with a large dollup of apple butter stirred in.  Mmmmmm.

Anyway, I went back to the internet and as I was looking around, I found a recipe at The Pioneer Woman Cooks called Jan's Dilly Bread.  I liked the looks of this recipe, because it brought back fond memories of the Cottage Dill Bread from the recipe booklet that came with my old ABM3100 Welbilt Bread Machine.  I made this recipe often (back when all my breads came from my bread machine).  I loved the taste of the dill and minced onion in the bread and how moist and soft it always turned out.  So here's the dilly bread I made for Bread Baking Day #40, 

Jan's Dilly Bread
slightly adapted from The Pioneer Woman Cooks

Ingredients
2 1/4 tsp instant yeast
1/4 cups warm water
1 cup cottage cheese, heated to lukewarm
1Tbsp + 1tsp honey
1 Tbsp dried minced onion
1 Tbsp softened butter
1 Tbsp dried dill weed
1 tsp salt
1/4 tsp baking soda
1 whole egg
1 cup white-whole wheat (I used King Arthur Flour)
1 1/4 cup bread flour

Dissolve yeast in warm water. 
Combine the warm cottage cheese, honey, minced onion, dill weed, salt, soda, and egg. 
Stir to combine.
Stir in yeast mixture gently, then add flour gradually, stirring gently.

I did all my mixing with my dough whisk and then at the end I turned the dough out onto my silicone mat to knead it a tad by hand, and to work in a little extra flour.  I placed the dough in a lightly greased, clean bowl, covered it with plastic wrap and let it rise for 1 1/2 hours until it doubled in bulk.  I turned it back out onto my mat, gently punched the dough down, gently shaped it into a round and placed it into a well greased, 9 inch cake pan.

I covered the dough again with plastic wrap and it rose for another 50 minutes on the counter.  It puffed up nicely, filled out the pan completely and rose above the top of the cake pan.  I then placed the pan into my preheated (350°) oven and baked it for ~30 minutes on a lower rack of the oven.  The bread started to brown a little too much, so after about 20 minutes, I moved the pan to a higher rack in the oven and it was done in 30 minutes even, though the directions had said 40-50 min.  After it came out of the oven, I turned the bread out onto my rack and brushed the top with melted butter.

This comforting bread went really well with Girlichef's Tomato Garlic Soup w/ Cheese Tortellini.  With the cooler weather we had this past week it made a perfect meal. 

To complete the perfect meal, for dessert we consumed the biggest Nutty Peanut Butter Cookies I've ever had.  These were made from the recipe on page 113, of The Sweeter Side of Amy's BreadThe cookies were about 4 inches in diameter.  (Hubby was being silly as I was trying to take pictures).


Bread Baking Day #40 - Bread with curd (last day of submission June 1, 2011)I had so much fun with this bread.  If you'd like to participate in Bread Baking Day #40, go to Zorra's blog to get the details.  If you'd like to see the roundup of all the different breads baked with curd, be sure to stop by Zorra's shortly after June 1 to view them.   

Tuesday, May 17, 2011

Easy, Tasty Cracked Wheat Bread


I acquired a 1.5 lb bag of cracked wheat a few months back from Weisenberger Mills, in order to bake this Whole Wheat bread with Mellow Bakers.  I wasn't too worried about using the bag of cracked wheat up, but now when I open my fridge and see that bag, it looks like alot of cracked wheat.  I couldn't find cracked wheat as an ingredient in any recipes from the other bread books I own, so I jumped on the internet yesterday peeking at various blogs and other websites.  I didn't have to look too far before I found one on allrecipes.com that looked promising.  I decided to have a go at it yesterday and it turned out a tender, nutty, slightly sweet little loaf that is perfect for sandwiches, (especially my lunchtime PB&J's), and toast.  Hubby's out of town at the moment, but he'll be back tomorrow for me to see how he likes it.

I changed the recipe just a little, corrected the pan size called for, and adapted the directions to how I like to make my loaves, and though I'm no cracked wheat bread expert,  I was really happy with the results.

Cracked Wheat Bread
adapted from Allrecipes.com

1/2 cup + 2 Tbsp water
1/4 cup cracked wheat
1 1/8 tsp + a pinch of instant yeast
2 Tbsp + 2 tsp warm water
1 Tbsp butter, softened
1 1/2 tsp salt
1 Tbsp molasses
1 Tbsp honey
1/2 cup milk
2 tsp flax seed, ground
1 cup whole wheat flour
1 cup bread flour + an additional 1/4-1/2 cup

In a small saucepan, bring water to a boil.  Stir in cracked wheat and simmer for 10 minutes; let cool to lukewarm.

Place the cracked wheat mixture in the bowl of your stand mixer, and add the butter, salt, molasses, honey, yeast, ground flax seed, whole wheat flour and 1 cup bread flour.

I put the remaining water, and the milk in a saucepan and heated it to ~ 95° and then poured it over the rest of the ingredients already in the stand mixer bowl.  I let all the ingredients sit undisturbed for maybe 10 minutes and then with the paddle attachment I mixed the ingredients for 2 1/2 - 3 minutes on low speed until the dough came together in a shaggy ball.  I added ~ 1/4 cup of additional bread flour as the dough was still a little too wet.  I stopped the mixer, switched to the dough hook and continued mixing on medium-low for about 7-8 minutes, making minor adjustments of added flour.  I turned the dough out onto my lightly floured silicone mat, and kneaded the dough for a couple more minutes until it was soft, supple and no longer sticky.  I lightly oiled a large bowl, rolled the dough around just a little to barely coat it with oil, placed it in the bowl and covered with plastic wrap.

Upstairs the dough went to sit on my dryer, while I dried a load of clothes.  It was cold in the house, so I figured it couldn't hurt.  I let the dough rise until approximately doubled, which took 1 1/2 hours.  I shaped the dough into a loaf, placed in a greased 4 1/2 by 8-inch loaf pan (the recipe incorrectly called for a  9 by 5 pan), spritzed the top of the loaf with a bit of cooking spray and loosely covered with plastic wrap.
Let rise until dough domes at least an inch above the rim of the pan.  It took my loaf ~ 1 hour and 15 minutes for this to happen.  I pressed my finger into the loaf to test to see if it was ready to bake and the indent remained, so into the oven it went.  I had preheated my oven to about 360°.  I baked 20 minutes and rotated the pan 180°, and then baked another 10 minutes until my thermometer read 188-189°.

I immediately turned the loaf out of its pan and let it cool briefly on its side, then turned it upright and ran a stick of butter over the top.

Next days PB&J was mighty yummy!!

Friday, May 13, 2011

Banana Pudding Pops

Its been so warm here this week, I found that I had images of popsicles and ice cream cones dancing around in my head.   My new Cuisinart ice cream maker did arrive this week, but I really wanted to try out my new Tupperware popsicle molds that my mom and dad had gotten me for Christmas.  We had these molds as kids, but all that remains of that old set is a few of the sticks.  I don't know what happened to the rest of the set, which is OK, because all of the sticks are riddled with teeth marks and they are kind of dingy looking. 

My new set is lemon yellow with a lime green tray to hold the popsicles upright in the freezer.  I started thinking about these popsicles again, when I saw an article in an EatingWell magazine last year featuring various flavored freezer pops.  I decided to try the banana pudding pops recipe this week, and because we were all out of mini-chocolate chips, I put Hershey's Cinnamon Mini-chips into the pudding before filling the molds.  They are just delicious, very economical and hubby and I just sit there after dinner in quiet solitude savoring every lick (bite in his case) of our banana pudding pops. 

Banana Pudding Pops
from EatingWell.com

1/3-1/2 cups light brown sugar
2 Tbsp cornstarch
Pinch of salt
2 cups low-fat milk
2 tsp vanilla extract
2 cups diced bananas

(I cut the recipe in half and it filled all 6 of my Tupperware popsicle molds)

Whisk sugar to taste, cornstarch and salt in a large saucepan.  Add milk and whisk until combined.  Bring to a boil over  medium heat, whisking occasionally.  Boil, whisking constantly, for 1 minute.  Remove from the heat and stir in the vanilla. 

Put about half the pudding mixture in a blender or food processor and add bananas.  Process until smooth.  Stir the mixuture back into the remaining pudding.   I let the mixture cool to room temperature, and then added a couple tablespoons of cinnamon mini chips before adding the pudding to my popsicle molds.  Insert the sticks and freeze until completely firm, about 6 hours.  Dip the molds briefly in hot water before unmolding.

Monday, May 9, 2011

Multigrain Snickerdoodles


Finally, after a couple of days of so-so whole-grain recipes, I hit on one that is excellent.  I had bookmarked this recipe last fall, but since I didn't have barley flour, I had to wait until my desire for these cookies, supplanted my resistance to stash yet another type of flour in my pantry.  When growing up, snickerdoodles were my favorite of all my mom's homemade cookies.  I have made whole-wheat snickerdoodles before from this recipe, and they are good, but they do contain some all-purpose flour, and my goal has been to find recipes that use none.

The Multigrain Snickerdoodles recipe I tried yesterday contains no all-purpose flour, but includes barley flour, ground oats, and traditional whole wheat flour.  I found barley flour at Whole Foods in the bulk foods section, which I was grateful for so that I didn't have to commit to buying a whole bag.  According to the book, Good to the Grain by Kim Boyce, barley flour was the main bread grain in Europe ~ 500 yrs ago, before the great rise of wheat.  It also says barley flour works really well in doughs and batters (as a secondary flour) with a scent strangely reminiscent of ripe apricots.

I did not alter the recipe this time, except for cutting in half the ingredients for the cinnamon-sugar coating that the balls of dough are coated with.  To coat my dough balls, I followed the procedure my mom taught us as kids, and that was to combine the cinnamon-sugar in a cereal bowl, drop a ball or two in at a time and roll it around before placing on the cookie sheet.

Multigrain Snickerdoodles

Dough
3/4 cup (1 1/2 sticks, 6 oz) unsalted butter
1 1/2 cups (10 1/2 oz) sugar
2 tsp baking powder
3/4 tsp salt
1 tsp vanilla extract
1 Tbsp orange juice
2 large eggs
1 1/3 cups (4 5/8 oz) old fashioned rolled oats, ground for 30 seconds in food processor
1 cup (4 oz) whole barley flour
3/4 cup (3 oz) traditional whole wheat flour

Coating
1/3 cup (2 3/8 oz) sugar
1 Tbsp ground cinnamon

(I cut the coating ingredients in half and had just enough to coat all 38 dough balls.)

Cream the butter, sugar, baking powder, salt and vanilla in a large bowl or the bowl of your stand mixer.  Beat in the orange juice and eggs, scraping the bowl, then add the oats, barley flour and whole wheat flour, beating until well combined.  Refrigerate the dough, covered, overnight.

The next day, preheat the oven to 350°.  Lightly grease 2 baking sheets or line with parchment paper.  To prepare the coating, combine the sugar and cinnamon in a large plastic bag.  Drop the dough by the tablespoonful, 6 pieces or so at a time, into the bag.  Gather the bag closed at the top, trapping some air inside.  Shake gently to coat the balls with sugar mixture.  Place them on prepared baking sheets and flatten to about 1/2 in. thick, using the flat bottom of a measuring cup or drinking glass.

Bake the cookies, reversing the pans midway through (top to bottom, bottom to top), until they're beginning to brown around the edges, 12 to 14 minutes.  (I baked only 1 sheet of cookies at a time and all of my batches were closer to the 14 minute mark.)

Remove cookies from pan and cool completely on a wire rack.  Store in an air-tight container.  The book also says the cookies will stay soft and chewy unless you leave the cookies out over-night to harden and then store them.  I prefer mine to stay soft and chewy so mine were stored after cooling.

It's hard for me to convey the deliciousness of the food without alot of photographic talent or eye-catching props, but believe me these cookies are good and well worth the effort if you are searching for whole-grain cookie recipes to try.